

STEP BY STEP INSTRUCTIONS FOR ATTAINING CORRECT GRIP
1. With the non-shooting hand, the athlete picks up the pistol by the barrel end, being careful not to smear the blackened sights and to keep the muzzle pointed down range.
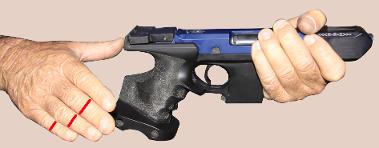
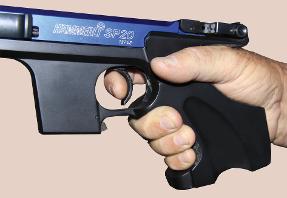
2. The index finger and thumb of the gripping hand are spread apart to form a "V". It is also noted the markings on the last three fingers. These are marked central on the second joint of each finger.
3. The pistol back strap is fitted straight and firmly into the web of skin between the thumb and index finger.
4. The web should be placed as high as possible on the back strap, without interfering with the hammer or obstructing the action of the slide of an automatic pistol.
5. The grip is pushed firmly against the inside of the bulge of flesh at the base of the thumb.
6. Safety dictates the trigger must not be contacted at this time.
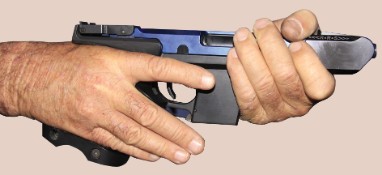
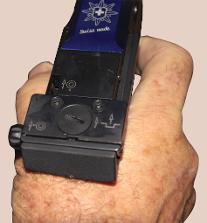
7. The lower three fingers should come to rest, closely touching each other, with the centre bone of each finger resting on the curved surface of the 'front strap' of the grip.
Little or no pressure should be exerted on the finger tips extending around the front strap to the surface of the left hand side of the grip. Pressure exerted by the little finger on the front strap should be lighter than that brought to bear on the middle and ring fingers.
Too much pressure with the little finger may cause the muzzle to depress slightly, resulting in the front sight aligning low in the rear sight notch.
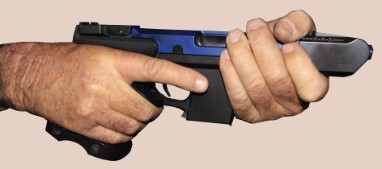
8. The thumb should not exert great pressure on the side of the pistol, as early fatigue may result. Pressure exerted by the tip of the thumb has a tendency to disturb sight alignment. Only the required supporting force should be exerted to hold the firearm in place in the shooting hand. The thumb angle should correspond with the trigger finger angle. Some athlete’s thumbs, appear to be “hooked” downward, but in reality, it is simply resting slightly lower than the trigger finger and little to no pressure applied downward.
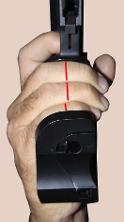
9. A controlling grip can be effected by the lower three fingers directing primary pressure on the front strap, straight to the rear. This can be compared with a vice, with the inner surface of the palm as the stationary jaw of the vice and the lower three fingers pressing on the front strap as the moving jaw. As indicated in Fig 1 the lines marked are now in-line and relatively central to the bore line.
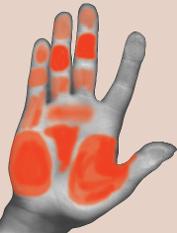
The shaded areas show the pressure points. The darker areas are the main gripping points with the lighter shades lightly touching the grip but still helping in controlling the grip.
10. The non-shooting hand should be used to adjust the 'fit' of the pistol into the shooting hand for correct alignment when being pointed to the target centre.
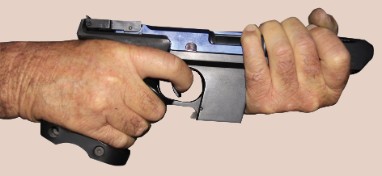
11. The gripping hand must reach around far enough to allow the trigger finger to reach into the trigger guard and to position itself on the trigger at the exact point at which trigger pressure can be applied straight to the rear. Care must be taken that there is no interference of touching the side of the grip or pistol frame with the trigger finger.
12. According to the size of the hand, the trigger finger will apply pressure with either the tip, the ball of the first joint, the crook of the first joint, or elsewhere.
The primary concern is not what portion or 'spot' along the trigger finger is the standard point of contact, but at what spot on the finger the athlete can best press the trigger straight to the rear without disturbing the sight alignment.
Make a free website with Yola