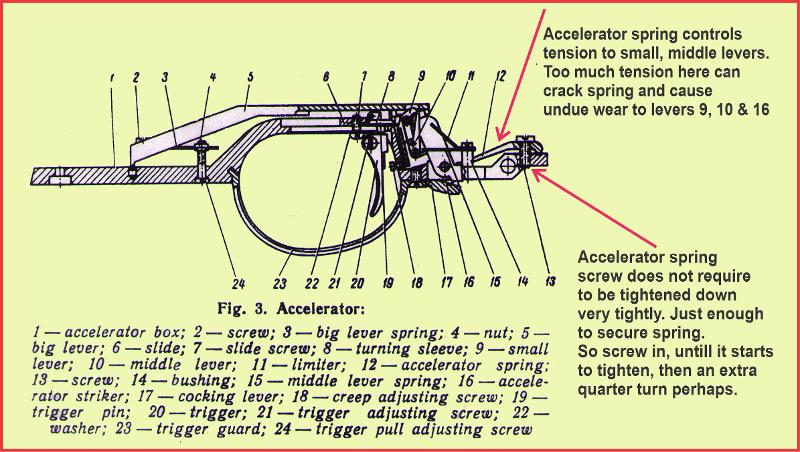
The following article was written and given to me by Alex Taransky (Dec.) many years ago. It was his forte to tune TOZ 35's and many other pistols. We still receive many queries regarding trigger set up, so we thought it would be a good time to share Alex's notes. I have redrawn some diagrams and copied diagrams from the manual.
TUNING THE TOZ - 35 TRIGGER
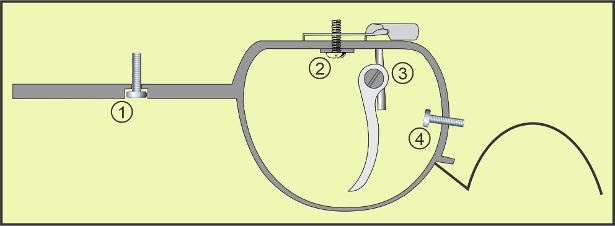
Screw 1 Trigger Weight - turning clockwise increases the weight.
Screw 2 Trigger position - loosen screw to rotate the entire trigger unit for side-on finger application onto the “finger pad”. - this also allows forward/rearward adjustment of the trigger for longer or shorter reach.
Screw 3 Vertical position - loosen to set the height of the trigger.
Screw 4 Sear engagement - clockwise decreases amount of engagement.
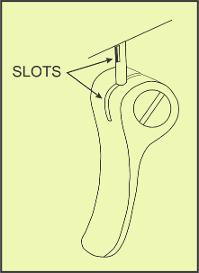
PLEASE NOTE: The trigger must NOT be rotated on the shaft. The slot in the “finger pad” and the slot in the top of the shaft on which it locates MUST be kept aligned while the entire trigger unit is rotated, or is moved to the front or to the rear.
SETTING UP THE TRIGGER
1. Cock the set trigger.
2. Turn screw 4 clockwise until the set trigger “fires”.
3. Turn screw 4 anticlockwise one quarter of a turn.
4. Cock and “fire” the set trigger to check its operation.
5. Adjust screw 1 to the required weight.


STORING THE TOZ - 35 Before putting the pistol away, check that the chamber is empty, then carry out the following procedure.
Cock the set trigger.
Using the action-lever protruding through the grip, slightly open the action.
Fire the set trigger.
This should release the main spring.
If the action-lever moves to the rear, it shows that the main spring is released. Check by slightly opening the action.
Some spring tension indicates that the main spring has been released.
The pistol may now be stored.
If the action-lever is “floppy”, it means the main spring is still compressed.
Do NOT put the pistol away like this.
Follow the above instructions to release the tension on the main spring.
DRY FIRING THE TOZ - 35 Slightly open the action enough to check that the chamber is empty. Make sure that the main spring is not under tension. See instructions above. With the main spring released and the action-lever locked in the rear position, the set trigger may now be cocked and dry-fired without damaging the mechanism.
Make a free website with Yola
